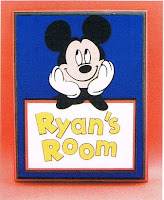
What a fun and easy way to brighten up a room! This colorful wood sign will delight any little occupant. Make it in minutes following these simple directions.
Materials:
Wood sign board
Acrylic paint: black, red, blue
Adhesive
(If you have a Cricut machine):
Cardstock: black, white, flesh, red, yellow
Adhesive
(If you have a Cricut machine):
Cardstock: black, white, flesh, red, yellow
Cricut font cartridge, sticker letters, or alphabet stencil
Cricut Mickey & Friends cartridge
(If you do not have a Cricut machine):
Click here to buy a pre-assembled Mickey
Sticker letters or alphabet stencil
(If you do not have a Cricut machine):
Click here to buy a pre-assembled Mickey
Sticker letters or alphabet stencil
Step One:
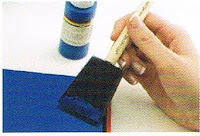
Paint wood sign board with acrylic paints as desired.

Step Two:
Using Mickey and Friends cartridge and black cardstock, cut one 5 1/2" .
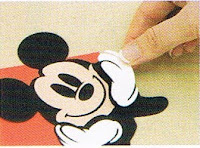
Using flesh-colored cardstock, press Layers: Face/White feature and cut one 5 1/2" to cut face. Using white cardstock, press Shift and Layers: Face/White feature and cut one 5 1/2" to cut eyes and gloves.
Assemble Mickey head

Assemble Mickey head

Step Three:
Create phrase.
Cut one 6" x 3.75" rectangle of white cardstock. Mat onto red cardstock and finally black cardstock. Create name or phrase on white cardstock using a Cricut font cartridge, sticker letters, or alphabet stencil.


No comments:
Post a Comment